
Apex height is the maximum vertical distance a golf ball reaches during its flight, measured from the elevation where you struck it. That single number tells you more about your ball flight than almost any other metric: a higher apex generally means more carry and a steeper landing angle that stops the ball quickly, while a lower apex produces a penetrating flight with more roll after landing. The number itself is a product of three inputs you can actually change: launch angle, spin rate (backspin), and ball speed.
Table of Contents
- What does apex height mean in golf, and how is it measured?
- What actually determines how high the ball flies?
- Why does apex height affect your shots so much?
- Typical apex ranges by club: what the numbers actually look like
- Why is your apex too low or too high, and how do you fix it?
- How to test and track apex using launch monitors and Sim2coursecaddie
- Key Takeaways
- Sim2coursecaddie turns your apex data into real improvement
- Useful sources
What does apex height mean in golf, and how is it measured?
Launch monitors like TrackMan and FlightScope don't measure apex directly with a ruler. They use radar or camera-fusion technology to model the full 3D trajectory of the ball, then identify the highest point that trajectory reaches. That peak is reported as apex height, referenced back to the elevation at impact, not sea level or ground level at the landing zone.
FlightScope and similar systems express apex in feet or meters, and the number typically appears on the same screen as launch angle, spin rate, and ball speed. Most consumer launch monitors and shot-tracking apps follow the same convention.
- Apex height: — peak vertical distance from launch elevation (feet or meters)
Pro Tip: Measure apex under consistent conditions. Use the same ball model, avoid strong wind, and hit at least 8–10 shots before drawing conclusions. One outlier shot can skew a single reading noticeably.
What actually determines how high the ball flies?
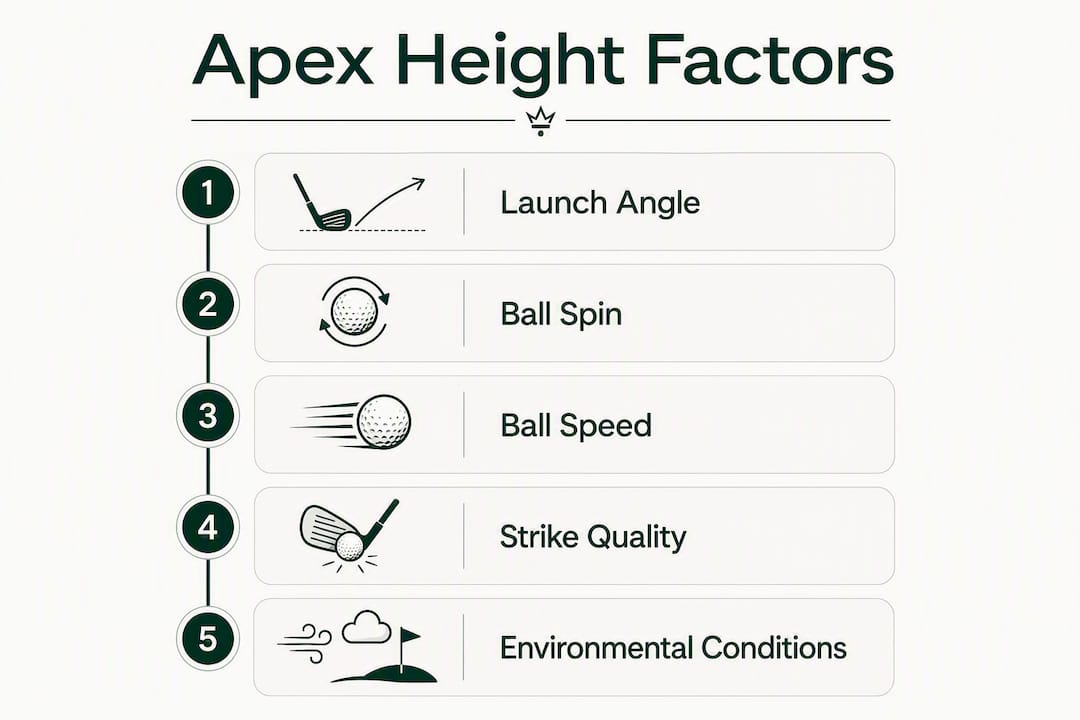
Apex is a derived metric, not something you can directly manipulate. When apex is off, the fix lives in one of its three primary inputs.
- Launch angle is the biggest lever. A higher launch angle sends the ball on a steeper upward path, producing a higher apex for a given speed and spin.
- Spin rate (backspin) keeps the ball climbing longer. More backspin extends airtime and pushes apex higher, but too much causes ballooning (more on that below).
- Ball speed determines how far those forces carry the ball. Higher speed can push a relatively low-launch shot to a surprisingly high apex.
- Angle of attack shapes both launch angle and spin: a descending blow with an iron increases dynamic loft and spin; a slightly ascending strike with a driver reduces spin and flattens launch.
Club loft and strike quality are secondary factors that feed into those primary inputs. A thin strike drops ball speed and spin simultaneously, collapsing apex. A fat contact does the same, often more dramatically. Choosing the right loft and shaft affects spin and launch enough to shift apex by a noticeable amount across similar swing speeds.
The interaction effects matter too. High launch combined with high spin can balloon the ball, sending it up steeply and then stalling it. High ball speed with moderate spin and a lower launch angle can reach nearly the same apex as a slower swing with higher spin, because speed compensates for the shallower trajectory.

Why does apex height affect your shots so much?
Higher apex creates steeper landing angles, which means the ball hits the green with more downward momentum and stops faster. That's exactly what you want on a firm approach shot to a tight pin. Lower apex produces a shallower landing angle, more bounce, and more roll, which is useful off the tee on a firm fairway or when playing into a headwind.
Wind interaction is where apex strategy gets interesting. A ball that peaks at 100 feet spends far more time in the air than one peaking at 60 feet. In a headwind, that extra airtime costs distance and exaggerates the wind's effect. A penetrating, lower-apex flight cuts through wind more efficiently.

Pro Tip: On tee shots, favor a slightly lower apex in wind and let the ball run. On approach shots to soft greens, a higher apex with a steeper landing angle gives you more control over where the ball stops.
For most recreational golfers, driver apex typically falls in the 80–100 foot range, though the right number for you depends on your ball speed, spin rate, and launch angle rather than any universal benchmark.
Typical apex ranges by club: what the numbers actually look like
One of the most counterintuitive findings from TrackMan's PGA Tour data is that driver and pitching wedge apex heights are often only about 3 meters (roughly 10 feet) apart in Tour averages. Higher ball speed on the driver compensates for its lower loft, while the wedge's high loft and slower swing speed produce more spin but less velocity. The result: apex heights converge more than most golfers expect.
| Club | Typical Apex Range (Recreational) | Key Driver |
|---|---|---|
| Driver | 80–100 feet | Ball speed + moderate spin |
| 6-iron | Moderate height range | Launch angle + backspin |
| 9-iron | Moderate height range | High loft + high spin |
| Pitching wedge | Moderate height range | Max spin, lower speed |
These are ranges, not targets. A golfer with 95 mph driver swing speed will naturally apex lower than someone at 110 mph with the same launch conditions. Two golfers can hit the same club to nearly identical apex heights through completely different combinations of speed, spin, and launch angle.
- The "ideal" apex for your driver is the one that maximizes carry without ballooning.
- Tracking multiple clubs reveals which ones are underperforming relative to their expected apex window.
- Apex scales with ball speed more than most golfers realize; improving contact quality often raises apex without any swing change.
Why is your apex too low or too high, and how do you fix it?
Low apex: common causes and fixes
- Low launch angle: check ball position (too far back) and address posture; moving the ball slightly forward often adds 2–4 degrees of launch.
- Low spin rate: usually from a delofted face at impact or a shaft that's too stiff; try a softer shaft or more loft.
- Thin or fat contact: both kill ball speed and spin; tracking your misses over multiple sessions reveals whether contact is the root cause.
- Wrong loft: a driver set too low in loft for your swing speed produces a flat, low-spinning flight with a collapsed apex.
High apex (ballooning): causes and fixes
Excessive backspin relative to swing speed causes ballooning: the ball climbs steeply, stalls, and falls short of its potential carry. Common causes include an out-to-in swing path, a high-spin ball that doesn't match your compression, or too much loft for your speed.
- Switch to a lower-spin ball model if your swing speed is above 100 mph.
- Reduce driver loft by 1–2 degrees and check whether apex drops without losing carry.
- Work on a more neutral swing path to reduce the spin added by a glancing blow.
A simple drill sequence
- Hit 10 shots with your current setup and record apex, launch angle, spin, and carry.
- Make one change only (ball position, loft setting, or ball model).
- Hit another 10 shots under the same conditions and compare the averages.
- Repeat the cycle over two or three sessions before drawing conclusions.
Pro Tip: Change one variable per session. Changing loft and ball position simultaneously makes it impossible to know which adjustment moved the needle.
How to test and track apex using launch monitors and Sim2coursecaddie
A reliable testing routine removes guesswork from apex work. Here's a simple sequence that works on any range with a launch monitor:
- Warm up for 10–15 minutes with half-speed swings before collecting data.
- Set consistent conditions: same ball model, same club, no strong wind.
- Hit 8–10 shots and record apex, launch angle, spin rate, ball speed, and carry for each.
- Average the middle 6–8 shots, dropping the clear outliers.
- Import the data into Sim2coursecaddie to visualize apex trends and compare against your carry and landing angle.
Multi-session tracking is where the real insight lives. A single session can be skewed by fatigue, temperature, or a slightly different ball. Tracking apex across four or five sessions reveals whether a change in loft or ball position is genuinely moving the number or just adding noise.
Inside Sim2coursecaddie's free analytics, you can visualize apex alongside dispersion and carry distance, which makes it easy to spot whether a higher apex is actually producing more stopping power or just more airtime with the same landing spot. The app's AI-driven improvement identification flags when apex trends shift across sessions, separating real mechanical changes from random variance.
Pro Tip: Save a baseline for each club before making any equipment change. That baseline is your reference point for every future session.
Key Takeaways
Apex height is a derived outcome: fix launch angle, spin, and ball speed first, and apex follows.
| Point | Details |
|---|---|
| Apex = peak flight height | Measured from launch elevation; reported in feet or meters by launch monitors. |
| Three inputs drive apex | Launch angle, spin rate, and ball speed determine how high the ball flies. |
| Higher apex stops faster | Steeper landing angles increase stopping power; lower apex adds roll and cuts wind drag. |
| Typical driver apex: 80–100 ft | The right number depends on your ball speed and spin, not a universal target. |
| Sim2coursecaddie tracks trends | Import launch-monitor data to visualize apex across sessions and catch real changes. |
Apex as a coaching metric: a perspective
Most golfers who start tracking apex make the same mistake: they fixate on the number itself rather than the inputs behind it. Apex is genuinely useful as a diagnostic, but it's a lagging indicator. When a student's apex drops across a session, the first question isn't "how do we get it back up?" It's "did launch angle drop, did spin drop, or did contact quality fall apart?" The answer is almost always one of those three, and the fix is specific to whichever one moved.
Where apex earns its keep is in multi-session trend analysis. A single session's average means little. But when apex creeps down across three consecutive sessions after a shaft change, that's a real signal worth investigating. Combine it with carry distance and landing angle data, and you have a complete picture of what the ball is actually doing, not just how high it went.
Sim2coursecaddie turns your apex data into real improvement
Most golfers collect apex data on the range and then lose it. Sim2coursecaddie solves that by letting you import shot data from any launch monitor, visualize apex alongside carry and dispersion in a 3D range view, and track how those numbers shift across sessions. The free analytics tier covers everything you need to start diagnosing apex trends today, with no hardware purchase required.
The Pro subscription ($1/month or $9.99/year) adds live GPS caddie features and AI-driven club recommendations based on your actual shot data and real-time course conditions, so the apex work you do in practice translates directly to smarter decisions on the course. Start with free analytics and see where your apex numbers actually stand.
Useful sources
These are the primary resources cited throughout this article and the best places to go deeper on apex height and ball flight measurement:
- TrackMan: Apex Height Parameter — TrackMan's official definition of apex, including how it's referenced to launch elevation. The authoritative starting point for measurement methodology.
- Titleist: Golf Shot Peak Height — Explains how ball construction and dimple pattern affect peak height across different player profiles.
- Golf Hubz: Understanding Apex in Golf Ball Flight — Accessible overview of typical driver apex ranges and how individual launch conditions shape the number.